Simple API Example 프로젝트 명세서
| 필드명 | 데이터 타입 | 설명 |
|---|---|---|
| id | long | Entity Id |
| name | String | 상품 이름 |
| price | int | 상품 가격 (전략:Identity) |
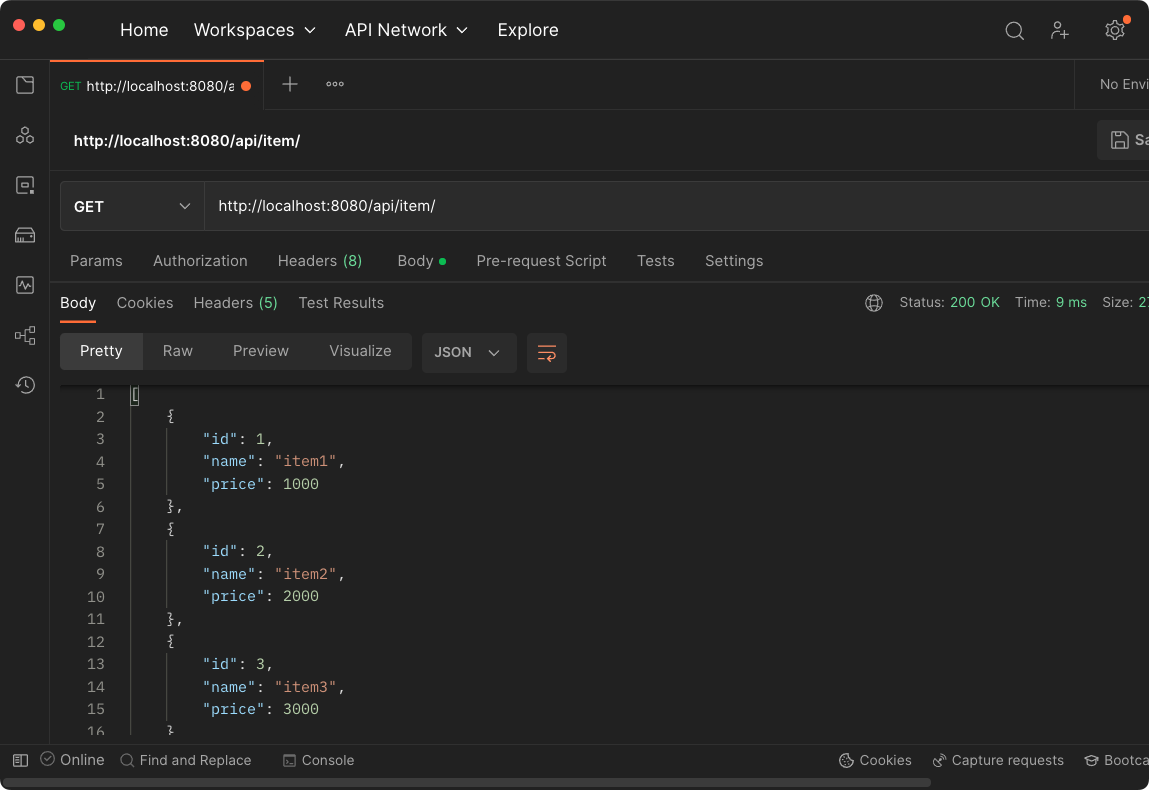
GET /api/item- 모든 상품의 정보를 가져옴
GET /api/item/{id}- 상품 하나에 대한 정보를 가져옴
{id}에는 int형의 데이터가 입력됨- Response Body에는 결과가 리스트 형식으로 반환
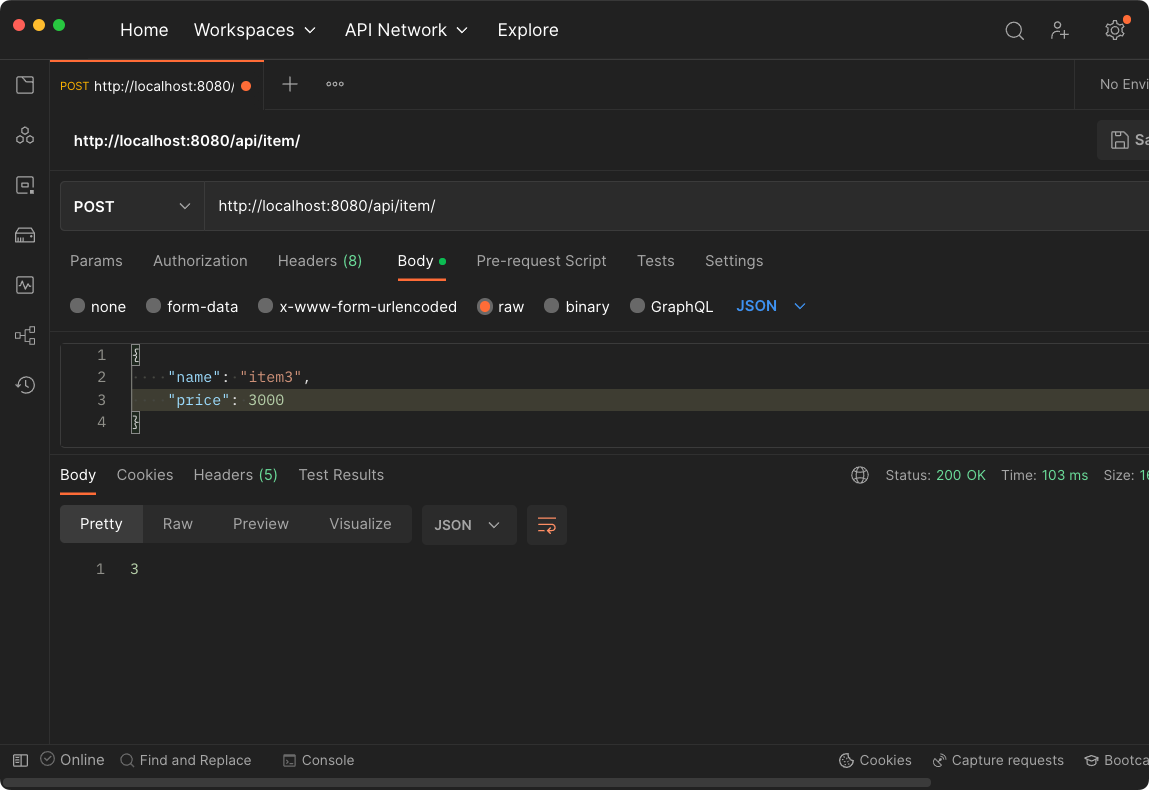
POST /api/item- 새로운 상품을 추가
- Request Body에 name, price 명시
- Response Body에 추가된 item의 id가 반환
PATCH /api/item/{id}- 상품 정보 수정
{id}에는 int형의 데이터가 입력됨- Request Body에 수정할 name, price 명시
- Response Body에 수정된 item의 id가 반환
DELETE /api/item/{id}- 상품 삭제
{id}에는 int형의 데이터가 입력됨- Response Body에 “삭제 완료” 반환
프로젝트 구현
1. application.properties 수정
- 해당 파일의 확장자를 properties에서 yml로 수정
- 코드의 가독성을 위해 변경함
application.yml파일에서는 h2 데이터베이스와 연결을 위한 설정을 명시- 아래 코드 작성
1
2
3
4
5
6
7
8
9
10
11
12
13
14
15
16
spring:
  datasource:
    url: jdbc:h2:tcp://localhost/~/simpleexample
    username: sa
    password:
    driver-class-name: org.h2.Driver
  jpa:
    hibernate:
      ddl-auto: create
    properties:
      hibernate:
        show_sql: true
        format_sql: true

logging.level:
  org.hibernate.SQL: debug
2. Item Entity 작성
1
2
3
4
5
6
7
8
9
10
11
12
13
14
15
16
17
18
19
20
21
22
23
24
25
26
27
28
29
30
31
32
33
package com.likelionsch.simpleapiexample.item;

import lombok.*;

import javax.persistence.Entity;
import javax.persistence.GeneratedValue;
import javax.persistence.GenerationType;
import javax.persistence.Id;

@Entity // Entity 명시
@Getter // 클래스 내에 선언된 변수에 대해 get 메서드 제공
@NoArgsConstructor(access = AccessLevel.PROTECTED) // 파라미터가 없는 기본 생성자 생성 (해당 생성자에 대한 접근 권한을 protected로 지정)
@EqualsAndHashCode(of = "id") // 클래스 내에 선언된 id 변수에 대해 내용이 동등함을 확인하는 equals() 메서드와 동일한 객체인지 확인하는 hashCode() 메서드를 생성
public class Item {
    @Id // 해당 변수가 id값임을 명시
    @GeneratedValue(strategy = GenerationType.IDENTITY) // 새로운 객체 생성시 1씩 증가하도록 설정
    private long id;

    private String name;
    private int price;

    @Builder // 생성자를 builder로 생성
    public Item(String name, int price) {
        this.name = name;
        this.price = price;
    }

    // 데이터 수정
    public void update(ItemDto itemDto) {
        this.name = itemDto.getName();
        this.price = itemDto.getPrice();
    }
}
- 이때
@builder를 쓰는 이유는 기존 생성자는 만약 여러 개의 값을 파라미터로 갖을 때 코드의 가독성이 떨어짐. - 또한, 기존 생성자의 경우 파라미터의 순서를 지켜야하지만,
@builder의 경우 순서가 상관이 없음
3. Item DTO 작성
1
2
3
4
5
6
7
8
9
10
11
12
13
14
15
16
17
package com.likelionsch.simpleapiexample.item;

import lombok.Data;

@Data
public class ItemDto {
    private String name;
    private int price;

    public static Item itemMapper(ItemDto itemDto) {
        // Item.java의 builder 생성자를 이용하여 객체 생성 후 반환
        return Item.builder()
                .name(itemDto.getName())
                .price(itemDto.getPrice())
                .build();
    }
}
-
Entity와 DTO를 구분하는 이유- 역할과 책임 분리 : Entity는 JPA를 통해 직접 데이터베이스와 상호작용함. 반면, DTO는 비즈니스 로직이나 특정 요청/응답과 관련된 데이터 전달을 담당함. 이렇게
역할과 책임을 분리하여 코드의 유지보수와 테스트의 용이성을 높일 수 있음 - API 설계와 데이터 노출 제어 : Entity는 데이터베이스와 밀접하게 연관되어 있으므로, 그대로 노출하면 보안 문제가 발생할 수 있음. 따라서 DTO를 사용하여
필요한 필드만 노출함으로써 데이터의 무결성과 보안을 보장할 수 있음
- 역할과 책임 분리 : Entity는 JPA를 통해 직접 데이터베이스와 상호작용함. 반면, DTO는 비즈니스 로직이나 특정 요청/응답과 관련된 데이터 전달을 담당함. 이렇게
4. Item Repository 작성
1
2
3
4
5
6
7
8
9
package com.likelionsch.simpleapiexample.item;

import org.springframework.data.jpa.repository.JpaRepository;
import org.springframework.stereotype.Repository;

@Repository
public interface ItemRepository extends JpaRepository<Item, Long> {

}
5. Item Service 작성
1
2
3
4
5
6
7
8
9
10
11
12
13
14
15
16
17
18
19
20
21
22
23
24
25
26
27
28
29
30
31
32
33
34
35
36
37
38
39
40
41
42
43
44
45
46
47
package com.likelionsch.simpleapiexample.item;

import lombok.RequiredArgsConstructor;
import org.springframework.http.ResponseEntity;
import org.springframework.stereotype.Service;
import org.springframework.transaction.annotation.Transactional;
import java.util.List;

@Service // Service 명시
@RequiredArgsConstructor // 클래스 내의 final이나 @NotNull이 붙은 필드의 생성자를 자동 생성해주는 어노테이션
@Transactional(readOnly = true) // 트랜잭션 사용
public class ItemService {
    private final ItemRepository itemRepository;

    // 모든 Item 반환
    public List<Item> findAllItems() {
        return itemRepository.findAll();
    }

    // 특정 id값을 가진 Item 반환
    // 만약, 해당 id값을 가진 Item이 존재하지 않을 경우 오류 발생
    public Item findItem(long id) {
        return itemRepository.findById(id)
                .orElseThrow(() -> new NullPointerException("존재하지 않는 Id 입니다."));
    }

    // Item 생성
    @Transactional // 트랜잭션 사용
    public Long createItem(ItemDto itemDto) {
        Item item = ItemDto.itemMapper(itemDto); // 새로운 item 생성
        Item newItem = itemRepository.save(item); // Repository를 통해 해당 item 생성
        return newItem.getId();
    }

    // Item 변경
    @Transactional // 트랜잭션 사용
    public Long updateItem(Long id, ItemDto itemDto) {
        Item item = this.findItem(id);
        item.update(itemDto); // Repository를 통해 해당 item 업데이트
        return item.getId();
    }

    // 특정 id값을 가진 Item 삭제
    public void deleteItem(long id) {
        itemRepository.deleteById(id);
    }
}
6. Item Controller 작성
1
2
3
4
5
6
7
8
9
10
11
12
13
14
15
16
17
18
19
20
21
22
23
24
25
26
27
28
29
30
31
32
33
34
35
36
37
38
39
40
41
42
43
44
45
46
47
48
49
50
51
52
53
package com.likelionsch.simpleapiexample.item;

import lombok.RequiredArgsConstructor;
import org.springframework.http.ResponseEntity;
import org.springframework.web.bind.annotation.*;
import java.net.URI;
import java.util.List;

import static org.springframework.hateoas.server.mvc.WebMvcLinkBuilder.linkTo;
import static org.springframework.hateoas.server.mvc.WebMvcLinkBuilder.methodOn;

@RestController // REST 컨트롤러임을 명시
@RequiredArgsConstructor // 클래스 내의 final로 명시된 변수를 포함한 생성자 생성
@RequestMapping("/api/item") // 기본 주소 설정
public class ItemController {
    private final ItemService itemService;

    // 모든 아이템 반환
    @GetMapping // mapping에 추가 주소를 적지 않을 경우 기본 주소를 가짐
    public ResponseEntity allItems() {
        List<Item> items = itemService.findAllItems();
        return ResponseEntity.ok().body(items); // 200과 함께 body에 아이템들에 대한 정보를 담아 전달
    }

    // 특정 id를 가진 아이템 반환
    @GetMapping("/{id}")
    public ResponseEntity findItem(@PathVariable Long id) { // @PathVariable를 통해 주소 내의 id값을 가져옴
        Item item = itemService.findItem(id);
        return ResponseEntity.ok().body(item);
    }

    // 아이템 생성
    @PostMapping
    public ResponseEntity createItem(@RequestBody ItemDto itemDto) { // @RequestBody를 통해 name, price 데이터를 가져옴
        Long newItemId = itemService.createItem(itemDto);
        URI createdUri = linkTo(methodOn(ItemController.class).createItem(itemDto)).slash(newItemId).toUri();
        return ResponseEntity.created(createdUri).body(newItemId);
    }

    // 아이템 수정
    @PatchMapping("/{id}")
    public ResponseEntity updateItem(@PathVariable Long id, @RequestBody ItemDto itemDto) { // @PathVariable을 통해 주소 내의 id값을 가져오고, @RequestBody를 통해 body 내의 데이터를 ItemDto 형식으로 가져옴
        Long itemId = itemService.updateItem(id, itemDto);
        return ResponseEntity.ok().body(itemId);
    }

    // 아이템 삭제
    @DeleteMapping("/{id}")
    public ResponseEntity deleteItem(@PathVariable Long id) {
        itemService.deleteItem(id);
        return ResponseEntity.ok().body("delete success");
    }
}
결과
아이템 생성
모든 아이템 출력
특정 아이템 출력

Comments powered by Disqus.